Pick Your Flavors and Your Toppings
The first step: Decide whether you are going to make your own ice cream or buy the ice cream from a store. One important thing to consider before making your decision: Homemade ice cream is much creamier and richer than the store-bought version. And if you do decide to make your own ice cream, we guarantee your guests will instantly notice a difference—and you’ll quickly be known as a hostess who can throw any type of party with ease. Today’s electric ice cream frozen treat makers can chill and churn your favorite flavors in as little as 20 minutes.
If you are confident in the kitchen and decide to make your own ice cream using an ice cream maker, we recommend that you use a simple vanilla ice cream recipe as a base. To create a delicious flavor for your guests, add your favorite crushed cookies or candies to the last five minutes of churning. Other great flavors you can make on your own include Mint Chocolate Chip, Salted Caramel and Berry Surprise—the flavor list for any ice cream social idea is endless.
Once the churning is complete, allow your ice cream to “cure” in the freezer for at least two hours before serving to be at the right consistency.
When your ice cream is at the stage you want, store it in an appropriate freezer-safe container—not in your ice cream maker’s freezer bowl, say the experts.
Stock up on ice cream cones, root beer for floats and sliced fresh fruit, especially bananas and strawberries for sundaes and splits.

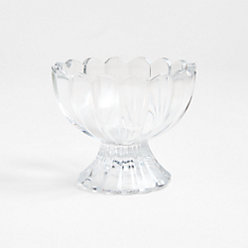
Select Your Serveware, Bowls and Spoons
Place bowls, spoons, ice cream cones and napkins first in line along a buffet table or your kitchen table.
Set out the ice cream containers next—don’t forget to provide easy-to-use scoopers for your guests. Look for an anti-freeze scoop that makes dipping into frozen ice cream easy. If you do make your own ice cream flavors, put cards with detailed information about the various flavors in place card holders.
Put all the topping options next to the ice cream. Sweet lovers know that there are so many delicious choices when it comes to toppings. One idea is to use a muffin tin to separate all the options, such as chocolate and rainbow sprinkles; chopped nuts; chocolate or carob chips; or even baby marshmallows. Make sure to provide a serving spoon for each topping.
Other favorite toppings like hot fudge, chocolate fudge, butterscotch, strawberry, caramel, Maraschino cherries, marshmallow crème and all your chopped fruits should each have their own serving bowl.
Don’t forget the whipped cream.
Lastly, set out pitchers of pre-made drinks for your guests, along with the appropriate glasses, together at the very end of the table. Drink choices for any ice cream social idea will depend on the season of your party. Iced tea and sodas in the summer; coffee, tea and hot chocolate in mugs for colder months.
Decorate the Party Space
Cover tables with brightly colored tablecloths, and set out plenty of napkins for spills and messes. Consider using place card holders to label your toppings. Accommodate guests with nut allergies by setting up a station of nut-free toppings and providing separate bowls, spoons and serveware. To avoid dealing with the mess of melting ice cream, immediately direct your guests to the ice cream, toppings and drinks when they arrive. With sweet treats and tasty libations, your work is nearly complete. Now you can sit down and enjoy your sundae.
For more ice cream party inspiration, check out the Crate and Barrel “Cookies, Ice Cream & Parfaits” Pinterest board.


